640 Pages in 15 Months
My book Crafting Interpreters on programming languages is done. OK, OK. I know I said it was done like fifteen months ago. But now it’s really done. And by that I mean, the print, e-book and PDF versions are done. You can buy it. You can hold it in your hands. And I do mean “hands” plural. Because this little “handbook” turned out way larger than I anticipated:

Look at that thing. 640 pages, eight inches wide, ten inches tall. If you get tired of reading it, it can serve as a doorstop or protect you from small-arms fire.
Remember back on Mr. Roger’s Neighborhood when he would take you to a factory and show you how pencils or umbrellas are made? I love that stuff, so I thought maybe you might like to see what I spent the past year on. You can read this as a peek behind the curtain, or maybe a long apology for why it took so long.
Where I left off#where-i-left-off
What I said in my last post was that Crafting Interpreters was finished, and by that I meant that I’d written all the code, dotted the last sentence, and scanned the last illustration. The content of the book was complete. But it wasn’t a book yet. Just a pile of Markdown and PNG files that my embarrassingly bad Python code would begrudgingly turn into a website.
My goal has always been to make a real book, with pages and everything. Completing the content was just one (granted, the most important) step in that journey. Once I finished the last chapter and put it online, I took about a month-long break. I had been writing every single day for almost four years and I was fried. Also, in case you don’t remember, early 2020 was not exactly a Totally Fine Time in World History.
A new build system#a-new-build-system
After a few weeks, my desire to have this project completely done returned and I eased my way back into working on it. I fixed a whole pile of typos and other mistakes that readers filed bugs for (thanks!).
Then, for no real good reason at all, I decided to rewrite the whole build system for the book in Dart. The build script I wrote for my first book was dead simple. Literally a single Python script that took a Markdown file for each book chapter and rendered it to HTML while weaving in the code snippets. The world’s dumbest static site generator.
I started with that for Crafting Interpreters but then it grew and grew. My second book includes every single line of code for two complete interpreters, which it builds up incrementally across thirty chapters. I needed to not just build the HTML for the book’s website, but also make sure the code really did work. I gave the build system the ability to not only generate the site for the book, but also to slice and dice the code. Given a chapter, or even a single point within a chapter, it can output a program containing all of the code for the interpreters up to that point. Then I can take that code, compile it, and run it through my automated test suite to make sure the code I’m showing you does what it’s supposed to.
Useful, but really straining the limits of how much code I want to maintain in a dynamically typed language like Python, at least, with my (low) level of Python expertise. Also, it was, frankly, really slow. So over a period of a couple of weeks, I rewrote the whole thing in Dart.
I work at Google on the Dart language team as my day job, so picking Dart was not an unbiased choice. But it’s my build system for my book, and I know Dart and many of its core libraries and packages like the back of my hand. Hell, I personally wrote the initial version of the canonical markdown package.
I found a pretty nice package for mustache templates, so I converted the book’s old Liquid templates to that. I didn’t find a good syntax highlighter. But it’s not like I looked very hard either. It seemed like just the kind of fun thing to implement from scratch, so I whipped one up loosely based on Pygments.
The end result is a new build system that generates exactly the HTML and syntax-highlighted code that I want. Also, it is literally ten times faster than the old Python one. As you’ll see, it turned out to be handy that I had better control over the Markdown processing, but at the time I was basically just doing this for fun and to procrastinate the real work.

Once I had the new build system outputting nice clean HTML and I’d deleted the old Python stuff, it was time to get started.
Designing the book#designing-the-book
Doing a large graphic design project like a book works a lot like web dev or game programming where it sort of has two levels. First you set up your “framework” or “engine”. On the web, this is your web framework and all of your CSS and HTML templates. In games, it’s your game engine. Then you pour content into that structure. With the right framework, adding content is easy.
For graphic design using a program like Adobe InDesign, the way it works is you set up styles and masters. A master defines the margins and grid lines for a page. It’s the fences that corral all the text to keep those feral letters from running around eating all the whitespace. Styles are like CSS: they let you take a semantic kind of text or object and associate specific fonts, styles and colors for it.
In theory, you get the masters and styles right and then typesetting is pretty easy and mechanical. Now, I did not make my life easy when it comes to book design. Book design is literally a two-dimensional spatial exercise and I made my job harder both horizontally and vertically. If you’ve read any of it on the web, you know my book has:
-
Prose, of course. So many words.
-
A lot of asides that need to be right next to certain pieces of text, code or illustrations that they refer to. Some of these can get pretty long.
-
Plenty of code. Also, each code snippet has a little location blurb next to it telling you where the code goes in the resulting program.
How wide?#how-wide
Horizontally, the main text column needs to be wide enough to fit the longest line of code. I can use shorter lines and wrap the snippets more, but that makes them harder to read. It also makes them vertically taller, which causes its own problem.
Then I need room next to that for the asides, since they often remark directly on specific sentences. I can make those narrower too, of course. But then they wrap and get taller. Some asides are fairly long and if they get too tall, they start colliding with each other or overlapping location snippets.
Oh, and since I ended up writing a 200k+ word book, it’s going to have a high page count. That means a thick book. Thick books need wider inner margins so the text doesn’t disappear into the spine.
All of this points towards a pretty wide page. Most CS textbooks—at least the ones on my bookshelf—are 7.5 inches wide. I tried hard to come up with a design that fit the code, asides, and healthy margins in that width while still giving a text size that didn’t require a magnifying glass. Eventually, I conceded defeat.
Once I tried designing a set of metrics for an 8 inch wide page, everything fell into place. I could have enough breathing room around the text to make it enjoyable to read, a decent length for the code snippets, and plenty of room for the asides. (Using a narrower font for the asides helped too).

How tall?#how-tall
That left the other dimension. If I were going with a real publisher doing a full offset print run, I could pick whatever page size I wanted. But since I’m self publishing, that would mean paying up front for thousands of copies to be printed and, I don’t know, storing all the boxes in my garage or something.
Print on demand worked great for my last book, and I planned to do the same thing for this one. That meant sticking to the limited set of page sizes that KDP and IngramSpark support. The only reasonable one that is 8 inches wide is 8”×10”, so that’s what I picked. The end result is a book that feels big, but hopefully not awkwardly huge. I’m sorry. I promise to write a smaller book if I ever write another.

The whole time I was picking these margins and metrics, I was also selecting fonts and building styles. You can’t do graphic design in a vacuum, so I picked a test chapter and just typeset it and tweaked the fonts over and over again. Eventually I got a set of fonts and styles I liked, some masters that seemed workable, and I was ready to go. The framework was done and now it was time to open the content hose.
XML, like its 1999#xml-like-its-1999
Of course, problem #1 is that there is no content hose. I have to build one. InDesign doesn’t know what the hell Markdown or my weird ass build system is. I sure as hell didn’t want to, like, copy every chapter from my browser, paste it into InDesign and then manually apply all the styles. I have a high pain tolerance, but I’m not a masochist.
What InDesign can do is import XML. Even better, you can set it up to
automatically apply certain paragraph or character styles to certain tag names.
InDesign’s XML support, alas, has not matured much since the time I described it
as being implemented by a narcoleptic intern. For example, in HTML
you can italicize a word in a header by taking an italics tag and nesting it
inside a header tag. InDesign cannot comprehend such advanced data modeling. It
needs a flat series of unnested tags and if you need italics in your header, you
damn well better have a unique <italics-header> tag for it.
But now I had an ace up my sleeve. Since I had microscopic control over my build system and its Markdown processing, I could write my own custom XML exporter that generated exactly the tags that would make InDesign not cry and avoid as many InDesign XML import bugs as possible.
JavaScript, in my InDesign?#javascript-in-my-indesign
Even so, XML import only gets you so far. Specifically, it gets you a “story” in InDesign terms: a single continuous narrative of text that fills the main text box and spans multiple pages:

The main story is where the prose and code snippets go, but the asides and the location markers need to be pulled out float off to the side. With my last book, I yanked those out manually. I literally cut each aside from the main text column and pasted it into a new text box. It took forever, and that book was less than half as long as this one with way fewer code snippets.
There are 1,133 code snippets in Crafting Interpreters. If I had to manually cut and paste the location markers for each of those, I would lose my mind. Worse, I would make a lot of mistakes, which would just create more work for myself.
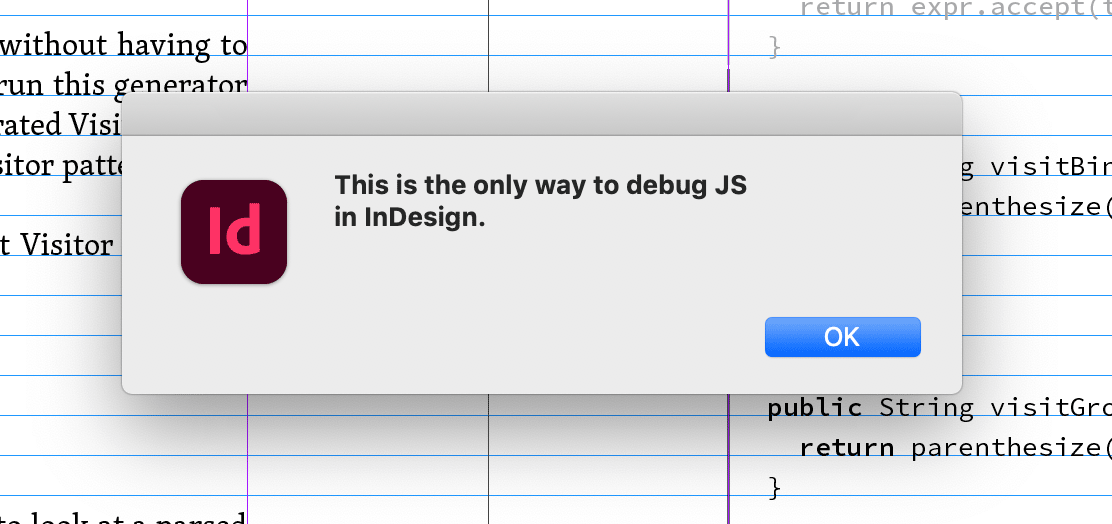
I’m an engineer so I am morally opposed to error-prone manual effort that can be automated. Did you know that InDesign can be scripted using JavaScript? Well, you do now, which apparently places you in a tiny minority because there are, like, no docs for it out there. You can find a couple of auto-generated references, a few sad cries for help from graphic designers clearly out of their element with no responses, and that’s it.
JavaScripting InDesign is a special kind of pain. There is no debugger. There
are no stack traces. There aren’t even debug prints. There is literally just
alert(), and you can only call it once. And it halts your script.
Fortunately, I actually learned JavaScript back when that’s all browsers gave
you, so I can hack it.
I managed to cobble together a horrific script that would find all of the asides and location markers, pull them out of the main text flow, and leave them off to the side:

What I wasn’t able to get the script to do was position the boxes correctly. But InDesign has a thing called “anchors” where you can lock the position of an element relative to another. A couple of carefully crafted Object Styles would even set the horizontal metrics correctly and align the text to the right baseline. All I had to do was anchor each text box and it worked perfectly!
Wait, did I say “perfectly”? I meant it worked right about half the time and the other half the time InDesign would inexplicably turn off the fucking borders of nearby code snippets.

I lost hours of my life to this stupid bug. Eventually, I realized that some completely random subset of location tags would have to be manually positioned because anchoring invariably broke some borders.
Editing, again#editing-again
All of the above took me a good month or so and then it was time to stop fiddling around and get to work on the actual content. The first thing I did was another editing pass of the entire book, front to back. I had already done three drafts of each chapter as I was writing them, but I wanted to do one more now that it was done so that I could get a better feel for continuity. It turns out I repeated the same dumb jokes a lot. I fixed (most of) those.
This took five months. There’s nothing fun to say about this, it was just a chore.
Copy editing#copy-editing
Next I hired an actual professional copy editor, Kari Somerton, to go through and do the same thing. She was great. Most of the editing world uses Microsoft Word and “Track Changes” to handle the editing process. Like most software engineers, I live and breathe plaintext and Git. That way I can see diffs of the changes, and go back through history.
I didn’t want to abandon my workflow so I asked Kari to ramp up on Git and my weird completely bespoke build system. She handled it with aplomb and churned through the book in no time. She found hundreds and hundreds of mistakes. This despite me doing four drafts and readers filing hundreds of issues already. Professional copy editors are worth every penny.
Typesetting the whole thing#typesetting-the-whole-thing
Once the words were as good as they were gonna get, it was time to get them onto pages. The process went like this:
-
Create a new InDesign file for the next chapter.
-
Export it to XML.
-
Import the XML into InDesign.
-
Run my little JavaScript script to pull out the asides and location markers.
-
Go through and anchor the side bar stuff.
-
Fix up whitespace at the end of pages.
The first five steps are a piece of cake. I’d wake up in the morning, brew a cup of coffee, shamble upstairs to the iMac, and get started. I could grind through those steps while half awake and get a chapter done in half an hour or so. It was peaceful. Almost meditative.
And then step six. You see, that right there is the hard thing about typesetting a book. And it’s the really hard thing about typesetting this book. Because it turns out there are a bunch of constraints on how content can be fit vertically in a page. Obviously, we can’t slice an illustration in half and put the top half on one page and the bottom half on the next. The asides also really need to fit on one page too, or it gets confusing to keep track of what they refer to.
Whenever possible, it’s nice for the code snippets to not get split across pages too. Some of those can be over a dozen lines long. (This is another reason why wider horizontal metrics helped. Because if I had made the code snippets narrower, they would end up taller, which would make them harder to fit on the page.) And you don’t want a header alone at the end of a page with no content after it. And it’s good to avoid widows and orphans…
Take all of those rules and restrictions, and mix in the completely fixed height of a page and you got yourself a real constraint solving problem. Or, in my case, 640 of them, all interwoven with each other. Because, you see, InDesign is happy to solve all of this for you by just pushing content to later pages. Code snippet too long? Move it to the next page. No room for prose under the header? Move it all to the next page. What that gives you is a ton of dead white space at the bottom of pages. It looks terrible and wastes space, like this:

Speaking of illustrations…#speaking-of-illustrations
At one level, the illustrations were easy. I specifically chose black and white pen and ink because it’s print friendly. When I first scanned the images as I wrote each chapter, I brought them in at glorious 1200 DPI. Here’s a crop:

A little level adjustment in Photoshop produces:

So detailed! Exporting these to high resolution bitmaps that print well was a snap, and they look great. (Well, as great as my handwriting looks, I guess.)
Incorporating the illustrations into the page layout was another story. Halfway through typesetting, a lightbulb went off and I finally realized why most books say, “Refer to Figure 123 to see blah blah blah…” That gives the typesetter freedom to put Figure 123 wherever the hell it fits on any nearby page.
In my dumb book, because I am an idiot, the prose just refers directly to the illustration. The illustration needs to be right there or the text doesn’t make sense. I didn’t think about that when each chapter was an infinitely scrolling web page, and by the time I realized, it was too late.
With the hundreds of illustrations and thousand-plus code snippets, I had given myself thirty giant interrelated bin-packing exercises. The hard part of typesetting was figuring out how to adjust things to minimize that dead space. Sometimes I’d split a code snippet in two. Maybe add a little extra padding around one image to spread stuff across the page a little. Or crowd another one so that it just fits on the page. Sometimes I’d tweak an illustration to make it shorter to fit on a page or taller to eat up some whitespace.
This was the real challenge of typesetting the book and why it took me two months to get through all the chapters.
Front matter and back matter#front-matter-and-back-matter
Did you know that there are professional indexers? People whose job it is to write indexes for books? They even write books about how to write indexes. (One would presume that these books have truly superb indexes.)
I did not hire one of those eminently skilled professionals. Instead, I spent two weeks going through every damn chapter again doing my best to pretend that I know what I’m doing. InDesign’s support for indexes is actually pretty nice. You can basically just select some text and say, “Make an index entry for this.” Then it collects all of those and generates an index for the whole book. But actually adding all of those entries is a mind-numbing chore.
The index is the main piece of back matter—the stuff at the end of a book after its main content. There is also front matter. You’ll never guess where that goes. I put together a title page, copyright page, dedication, and acknowledgements. Then I let InDesign generate a table of contents for me.
This was a magical moment. At this point, I had a complete book:

Or, at least, I had the inside of one.
Cover design#cover-design
A lot of authors obsess over their cover and envision it the whole time they are writing. Despite what the aphorism says, people do judge books by their cover and a good one makes a big difference. At least, that’s the case over in fiction land. In computer science, judging by the other books I have laying around, the artistic merit of the cover appears to be somewhat less critical. I guess when the prof says you have to buy the book to pass the class, a clip art cover is sufficiently compelling.
Since I am not a professor who can garner sales by fiat, I spent a lot of time on the cover design. I take photos, so I thought it could look nice to put something detailed on the cover to liven it up. I went through my thousands of photos trying to find something that fit. And, while I have some pretty pictures, none of them felt like they worked as covers. They felt arbitrary.
Eventually I realized that the visual language of the book is those pen and ink illustrations. So I drew a bigger more detailed version of the mountain illustration I use as a metaphor for the compilation process. I also hand-lettered a new title:

It’s a real typeface (Acumin Pro Extra Condensed) but I hand-traced a printout to give it some imperfect charm. I picked a color palette to try to give it a sort of a mimeographed 1950s scouting manual vibe.
Proofreading the proof#proofreading-the-proof
Now I really had a book. I uploaded the PDF exports to KDP and ordered a proof copy. A week later, a surprisingly heavy box arrived. This was the first moment I really understood just how big this book I wrote is. Up until this point, it was just data files. But seeing it fill up an Amazon box clarified the scale of the project in a way that the time I spent never quite did.
So I had a book, but it still wasn’t done. Because the typesetting process involved a lot of manual labor. To err is human, so now I had to proofread—to literally go through the proof and read it looking for mistakes. I marked them all with sticky notes:

Here’s where it got stressful. If you’re a programmer, then source control and diff is deeply ingrained in your workflow. Whenever I make a change, I take for granted that I can then see a diff in the commit to verify that I changed only what I intended and nothing else.
I did put the InDesign files in a Git repo, but they are giant opaque binary files. Also, InDesign has a habit of changing them even when it doesn’t seem like I’ve actually made any real changes. There’s nothing quite like syncing all the styles across the chapters, seeing every single file marked changed and wondering, “Did I just accidentally move every bullet list item 3 points to the left?” It felt like flying blind at exactly the stage in the process where I really wanted to see exactly what was happening.
Did I engineer my way out of this problem? You’re damn right I did. I wrote a Dart script that would take a PDF of the book, extract every page, and then generate a single huge PNG file with every page tiled across it. It looks like this:

If you zoom in, each page is about this big:

Every time I changed the InDesign files and committed them, I exported a PDF for that commit and generated a tile image. Then I wrote a little Photoshop action that would take two of those and draw a big red border around any pixels that differed. Here is what all of the proofreading changes look like:

And zoomed in:

There isn’t enough detail in the tile image to tell exactly what changed, but the red tells me which pages need a visual inspection. I know I should be proud of, like, writing an entire textbook on programming languages. But, honestly, I think I’m most proud of this dumb little script. It was such a relief to be able to programmatically verify that, yes, this PDF looks exactly like the last one except for the one expected change.
Ebooks are also books#ebooks-are-also-books
Once I incorporated all the proofreading fixes, the print edition was really for real totally done. But people also like reading ebooks and Kindle, so I needed to make those too.
Again, writing my own build system helped. I tweaked it to be able to export the antiquated XHTML that EPUB requires as well as all the weird metadata and manifest stuff that goes into one. A few command-line invocations later and I had Kindle and EPUB e-books. I tested in a bunch of readers and tweaked the CCS to try to find a compromise between all of their renderers.
Updating the site and launching#updating-the-site-and-launching
At this point—and now we’re talking this past weekend as I write this sentence—I had a folder with all of the final files for every edition of the book. All that remained was to update the front page of the book’s website to point to where people can get them. I took some photos and put on my web designer hat for a while. I tried to make it tolerably responsive.
Then I wrote this blog post. It’s weird to put that in the past tense since I just wrote it. But I guess it’s in the past now.
Tomorrow, I’m going to upload the files to the various sites and stores. I’ll update the site to have links to all of those as they go live. Once the stores have processed the uploads and everything is available, I’ll publish this post and update the site. I’ll write a note for the mailing list and feel nervous emailing that many people. If you’re reading this, I already did all that and the book is really, really done.
What next?#what-next
Ever since I finished the last chapter, people have been asking me what I’m going to do next. I have people I consider close friends now who have never known me when I wasn’t writing this book.
Many ask what I’m going to write next, or suggest a topic. I interpret this as a compliment—they like my writing and want more. But it also feels like asking a mom in labor whether she plans to have more kids. I’ve had my legs in the stirrups for six years, so I’m gonna just relax a bit after all the pushing is over before I even think about another book baby.
What I really plan to do is… not plan to do anything. This writing project has been an enormous exercise in self-applied delayed gratification. On top of that, the pandemic brought its own basket of deferred dreams. I’ve gotten so skilled at denying myself and postponing, so good at tuning out what I feel like doing, that it’s hard to even hear those feelings any more. I don’t remember what my own joy sounds like.
So I’m gonna check out for a while and go hunting for my pleasure centers. Maybe make some more music. Maybe go fishing. Probably spend more time with friends and family (safely). I might get back to working on my roguelike. Or maybe I won’t do any of those. Maybe I’ll just go out in the backyard and bask mindlessly in the sun like a lizard. The important part is I won’t decide until I feel like it.
I’m sure eventually I’ll get the itch to work on something more sizeable again. (But, God-willing, I will never spend six years on a single project again in my life.) Until then, I hope you enjoy the book. Despite all the work, I had a lot of fun making it, and it was always a joy to hear from readers who liked it. It’s the only thing that kept me going this long and enabled me to get it done.